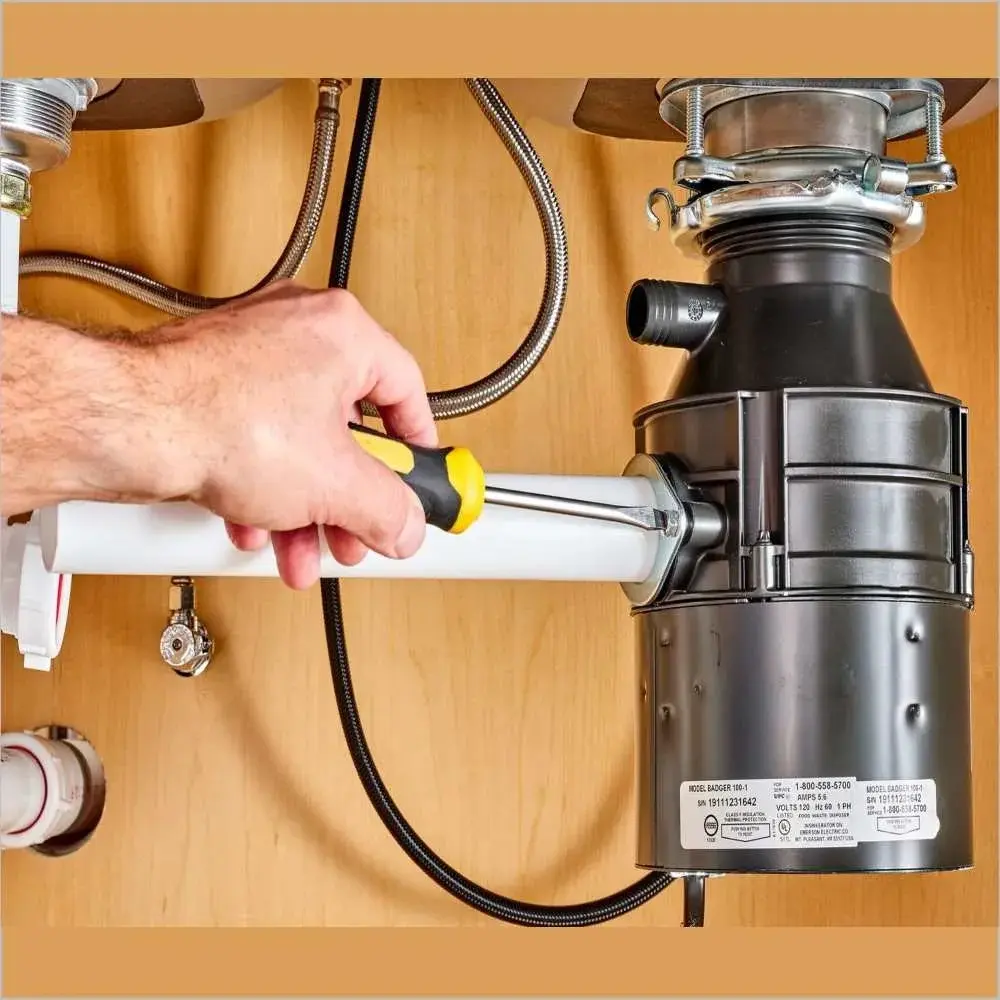
Cut the power, clear the obstruction with needle nose pliers, then turn the flywheel free with a quarter inch Allen wrench in the port underneath the unit and press the reset button. That sequence unjams the overwhelming majority of garbage disposals in under ten minutes, and it costs nothing but a wrench.
The part that trips people up is knowing they have a jam at all.
A jam and a clog feel identical at the sink. Water sits there either way. But inside the machine they are completely different failures, and treating one like the other is how a ten minute fix turns into a burnt out motor.
Let us make sure you are solving the right problem.
A Jam Is Not a Clog. Here Is the Difference
A clog is a blockage in the pipe below the appliance. The disposal spins normally. The water has nowhere to go.
A jam is a blockage inside the grinding chamber. The motor is trying to turn the flywheel and something physical is stopping it.
The sound tells you which one you have, and it takes three seconds to check.
Flip the switch. If you hear a low steady hum with no grinding, that is a jam. The motor is energised and straining against a locked rotor. It will shut itself off within a few seconds.
If you hear the normal grinding noise and water still pools, that is a clog. The appliance is doing its job.
If you hear absolutely nothing, you have a power problem, not a mechanical one.
Everything below is for the hum.
What Is Actually Happening Inside That Chamber
Understanding this makes the fix obvious rather than mysterious.
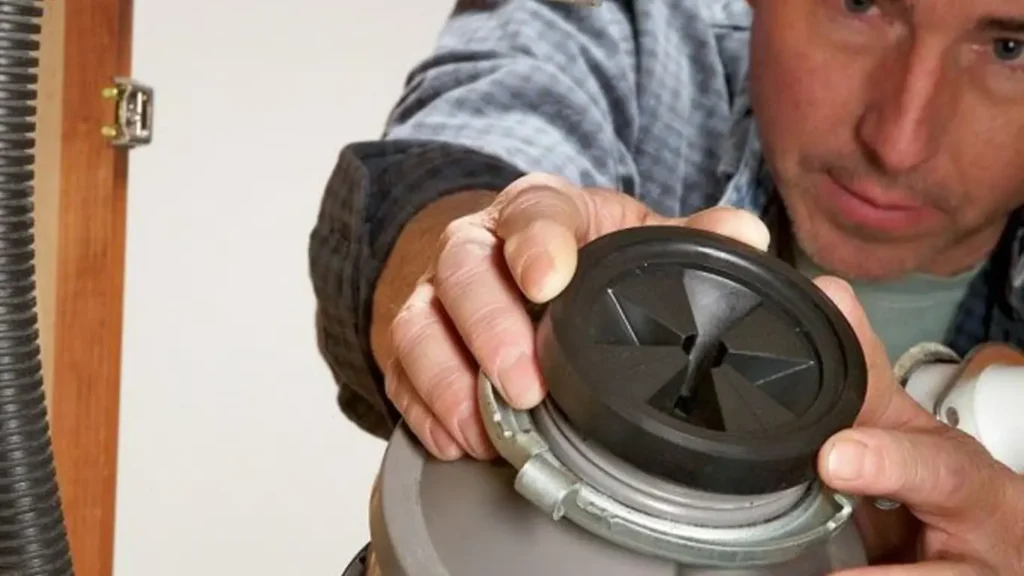
Your disposal does not have blades. It has a flywheel, a flat spinning plate with two blunt swivelling lugs called impellers. The flywheel spins fast and flings food outward against a fixed ridged ring called the shredder ring. The food gets pulverised against that ring and washed down through the outlet.
There is a narrow gap between the impellers and the shredder ring.
A jam is simply something hard sitting in that gap.
A bottle cap. A peach pit. A cabinet screw. A twist tie. A teaspoon that slid off a plate. Anything harder than the food it was designed for wedges in that gap and the flywheel cannot complete a rotation.
The motor tries anyway. That is the hum.
And because the motor is drawing full current while going nowhere, it heats up fast. Which brings us to the component that saves you money without you knowing it.
The Reset Button Is a Circuit Breaker for Your Motor
On the underside of nearly every disposal there is a small red button. Most people have never noticed it.
That is the overload protector. When the motor draws too much current for too long, it pops out and cuts power. It is the only thing standing between a jam and a burnt out winding.
Two things matter about it.
It will not stay pressed while the motor is hot. If it pops back out immediately, wait five minutes and try again. People conclude their disposal is dead when it simply needs to cool.
Pressing it does not fix the jam. It only restores power. If you press reset and flip the switch without clearing the obstruction, you are putting the motor straight back into the same overload. Do that repeatedly and you will kill it.
Clear first. Reset second. Every time.
The First Ten Minutes: A Walkthrough
Here is the whole procedure in order. Follow it exactly and you will be finished before your coffee goes cold.
Minute One: Kill the Power
Open the cabinet. If the disposal plugs into an outlet under the sink, unplug it. If it is hardwired, go to your panel and switch off the breaker.
The wall switch is not enough. Switches stick. Somebody else in the house does not know your hand is in the machine.
Do this too: put a piece of tape over the wall switch. It takes four seconds. It has prevented more injuries than every warning label ever printed.
Minute Two: Look
Get a flashlight. Pull the rubber splash guard aside with one hand and shine the light straight down onto the chamber floor.
You are looking at the gap between the impellers and the outer ring.
Most jams are visible immediately. A glint of metal. A pale curve of fruit stone. Something that does not belong.
Minute Three: Extract
Take needle nose pliers or long kitchen tongs and lift the object out.
Work slowly and pull straight up rather than levering sideways. Levering can bend an impeller, and a bent impeller is a replacement rather than a repair.
Never use your fingers. Not even with the breaker off. The shredder ring edges are rough enough to open skin without any motion at all.
Then check for a second object. This is the step almost everyone skips. Where one bottle cap fell in, a second usually followed. Clearing one and running the machine on top of another is precisely how motors die.
Minute Four: Free the Flywheel
Even after the object is out, the flywheel is often still stuck from the pressure it was under.
Go under the sink and look at the dead centre of the base. There is a hex shaped port there. Nearly every unit has one, including the common InSinkErator, Badger, Waste King, and Moen models.
Insert a quarter inch Allen wrench and rock it firmly back and forth in both directions.
You are waiting for one specific sensation. A release. It arrives as a distinct pop, and after it the wrench turns freely through a complete rotation.
That is the flywheel letting go.
If your original wrench vanished years ago, any hardware store Allen key set works. Zip tie the correct size to the drain pipe once you are done so it never disappears again.
Minute Five: Reset
Press the red button until it clicks and stays seated. If it will not stay in, the motor is still warm. Wait and try again.
Minute Six: Test Carefully
Restore power. Turn on cold water first, then flip the switch for two seconds only.
Two seconds. Not ten.
If it grinds normally, run it for another fifteen seconds with water flowing and you are finished. If it hums again, cut the power and go back to Minute Two, because something is still in there.
What Was Actually Stuck In There?
Knowing the usual suspects helps you find the one you missed.
Metal from the kitchen. Teaspoons and forks top the list by a wide margin. Bottle caps and jar lids follow. Then the surprise entrant, small screws and nails that fell in during a cabinet repair.
Hard organic matter. Peach, plum, avocado, and mango stones. Chicken and pork bones. Corn cobs.
Packaging. Twist ties, produce elastic bands, the plastic ring from a milk bottle, bread bag clips.
Kids’ items. Bottle teats, small toy parts, and the perennial favourite, a magnetic fridge letter.
Fibrous debris that wrapped rather than wedged. Celery strings, corn husk, artichoke leaves, and onion skin do not block the gap so much as wind around the impeller pivot and lock it. These look like nothing and cause real jams.
Question worth asking:
When did you last look at what actually goes down that drain during cleanup? Most jams are traceable to a single moment of scraping a plate without looking.
How to Tell If You Damaged the Motor
Sometimes the jam is cleared and the unit still is not right. Here is how to read what you are hearing.
It grinds normally and drains cleanly. No damage. You caught it in time.
It runs but sounds rougher than before, with a rattling metallic edge. An impeller has likely bent or the shredder ring has been scored. It will keep working for a while but performance will drop.
It spins freely by wrench but the motor only hums, repeatedly, with nothing obstructing it. The starting winding or capacitor has probably failed. That is the end of the appliance in most cases.
It runs but water leaks from the bottom seam of the housing. That is an internal seal failure, not a jam consequence. Units leaking from the body are replaced, not repaired.
It trips the breaker rather than the reset button. Stop. That is an electrical fault and it needs a technician.
Five Mistakes That Turn a Jam Into a Replacement
Everything on this list is something people do with good intentions.
Repeatedly hitting reset and trying again. Each attempt cooks the motor a little more. Two failed attempts is the limit before you investigate properly.
Putting a drill on the hex port. The torque a drill delivers will snap a flywheel or crack the housing. A broken flywheel is a new unit.
Pouring in a chemical drain opener. Wrong tool for the wrong fault entirely. It cannot dissolve a spoon, it corrodes internal parts over time, and it leaves you fishing tools through a basin of caustic liquid.
Using a broom handle for leverage. People try to lever the flywheel through the sink opening with a wooden handle. It works occasionally. More often the handle snaps and leaves splinters in the chamber, or it bends an impeller.
Reaching in with a hand. It happens more than it should, and the injuries are worse than people expect even with the power off.
Keeping It From Jamming Again
Three habits carry almost all the benefit.
Run cold water before, during, and for thirty seconds after. Not a token splash. A steady flow. It carries debris out instead of letting it settle around the flywheel pivot.
Scrape plates over the bin, not the sink. The disposal is for what escapes the scrape, not for the meal itself.
Keep the drain covered when not in use. This single change eliminates the entire category of accidental object jams. A basket strainer sitting in the opening stops the spoon, the cap, and the screw before they ever reach the chamber.
One more worth doing monthly. Drop in a couple of cups of ice with a handful of coarse salt, run cold water, and let it grind for thirty seconds. It scours the ring, clears the pivot points, and takes less time than making tea.
When to Stop and Call Someone
There is a clear finish line for do it yourself here.
When the wrench will not move at all in either direction after firm effort, the chamber is seized in a way hand tools will not solve.
When the motor hums with the flywheel spinning freely. The mechanical side is clear. The electrical side is not.
When you see water at the bottom of the housing. Seal failure. The unit is finished.
When there is a burning smell or scorching near the wiring. Cut power at the breaker and leave it off.
When it jams repeatedly within days despite nothing obvious going down the drain. Something structural is wrong, often a worn impeller pivot letting debris catch every cycle.
Ask yourself before you push further:
How long have you been at this, and what is that time worth? Plenty of people cross the point where calling was cheaper and keep going out of stubbornness.
Quick Answers
Why does my garbage disposal hum but not spin?
Something hard is wedged between the impeller and the shredder ring. Cut power, remove it with pliers, then free the flywheel with an Allen wrench.
Where is the reset button on a garbage disposal?
On the underside of the unit, usually dead centre or slightly to one side. It is small and red.
What size Allen wrench unjams a disposal?
A quarter inch hex is standard on almost all residential models.
Can I use a broom handle instead of a wrench?
Not recommended. It can snap, splinter, or bend an impeller. The wrench costs a few dollars and does the job properly.
How many times can I press reset?
Twice at most before investigating. Repeated overload cycles damage the motor.
Will a jam damage the disposal permanently?
Usually not if cleared promptly. Repeated attempts to run a jammed unit are what cause lasting damage.
Quick Steps to Safely Unjam Your Garbage Disposal
Power off. Look. Extract. Wrench. Reset. Two second test.
That is the whole procedure, and it resolves most jams before you have finished thinking about it.
The failure to avoid is not the jam itself. It is the reflex to hit reset and try again, because that is the move that takes a repairable appliance and turns it into a purchase.
Still humming after you have cleared the chamber and freed the flywheel? That points to the motor or the electrical side rather than an obstruction, and it is worth having a technician confirm which before you spend money replacing anything.