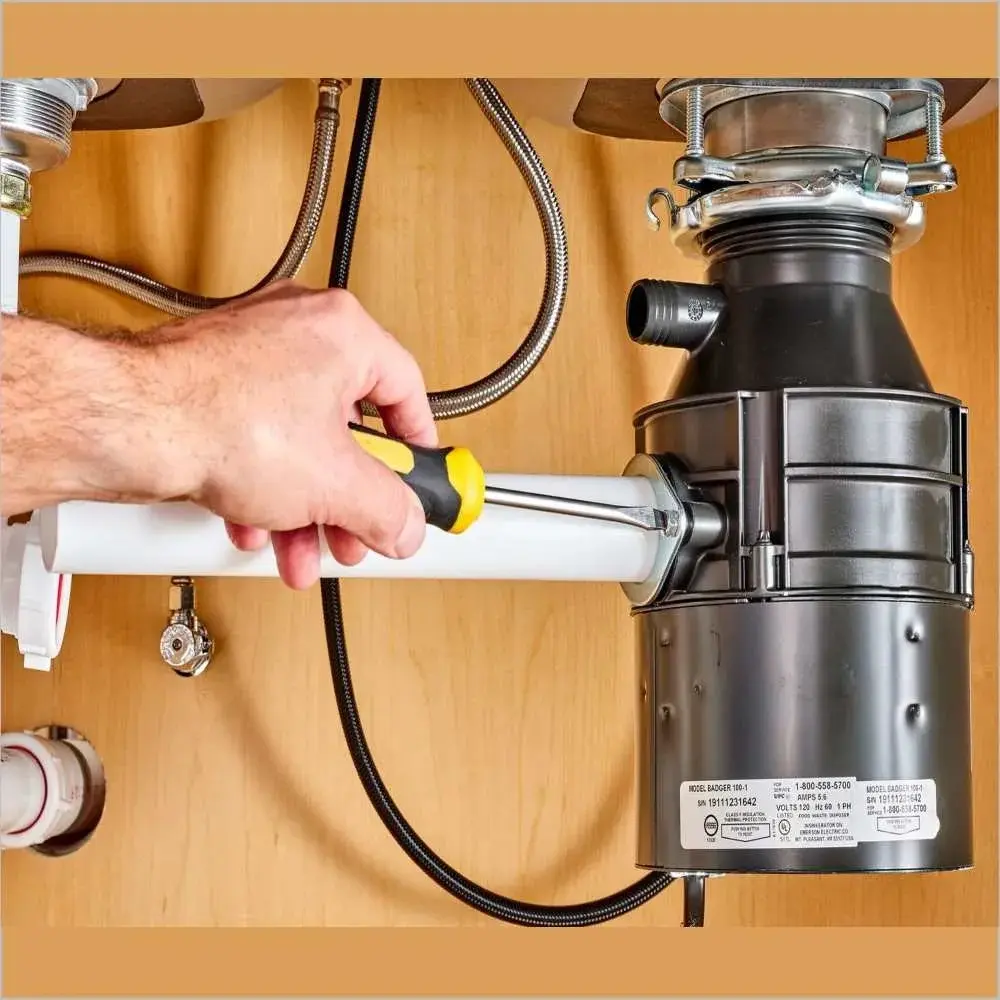
Use a sink plunger, an Allen wrench in the flywheel port, needle nose pliers, a hand crank drain auger, or a baking soda and vinegar flush to safely unclog a garbage disposal. Those five options cover nearly every blockage a home kitchen produces. What you must avoid is any caustic drain opener, any power tool forced into the hex port, and any version of reaching in with your hand.
The trick is not memorizing that list. The trick is knowing which of the five your specific clog calls for, because using the right one takes ten minutes and using the wrong one wastes an afternoon.
Let us sort that out.
First, Answer This: Is the Disposal Clogged, or Is the Drain?
This is the fork in the road, and most people skip it.
A garbage disposal sits at the top of a drain assembly. Below it is the P trap, then a branch line, then the main stack. A blockage can live in any of those places, and the fix is different for each.
Run this sixty second triage before you touch a tool.
Flip the wall switch. What do you hear?
A loud hum with no rotation means the grinding chamber is jammed. The blockage is inside the appliance.
Total silence means no power is reaching the motor. Check the reset button and the breaker before assuming anything is clogged.Similar electrical troubleshooting applies to other home systems too, where a tripped braker can interrupt normal operation.
A normal grinding sound with water still pooling means the appliance is working perfectly and your blockage sits downstream in the trap or the line.
Now fill the other basin if you have a double sink. If water rises on the disposal side, the clog sits past the point where both drains merge.
That single test tells you whether you are working above the sink or under it. Everything after this depends on the answer.
Before Any Tool Goes In: Kill the Power
Non negotiable.
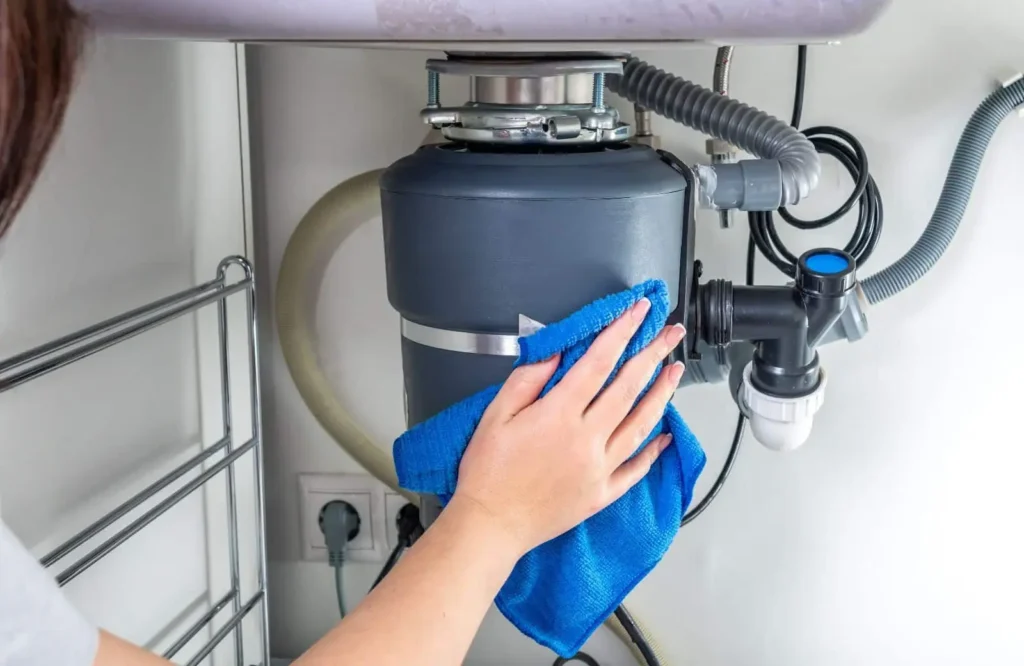
Unplug the unit from the outlet inside the cabinet, or switch off the dedicated breaker at your panel if the disposal is hardwired.
Never work on a disposal that is still connected to power. The wall switch alone is not enough protection, because switches stick and other people in the house do not know your hand is near the chamber.
Do this too:
Lay a towel across the cabinet floor and slide a shallow pan under the trap. You will thank yourself in about fifteen minutes.
Clog Type One: Something Hard Is Wedged in the Chamber
Symptom:
Loud hum, no rotation, and the unit shuts itself off after a few seconds.
What to use:
Needle nose pliers or long tongs, plus an Allen wrench.
This is a jam, not a clog, and it is the most common failure by a wide margin. A bottle cap, a peach pit, a screw, a twist tie, or a rogue spoon has dropped between the impeller and the shredder ring.
Shine a flashlight in and pull the rubber splash guard aside so you can see the chamber floor. Reach in with pliers or tongs so nothing soft ever goes near the grinding components.
If you cannot spot the culprit, go under the sink. Nearly every unit, including standard InSinkErator, Badger, Waste King, and Moen models, has a hex shaped port in the dead center of the base.
Insert a quarter inch Allen wrench and rock it back and forth in both directions. Turning the flywheel by hand breaks the jam loose so the chamber spins freely again.
You will feel it release. It is a distinct pop.
Then press the small red reset button on the bottom of the unit until it clicks and stays seated. Wait about five minutes first so the overload protector has cooled, otherwise it trips again the moment you flip the switch.
Immediate tip:
If the original wrench that shipped taped to the housing has vanished, any hardware store Allen key set works. Zip tie the right size to the drain pipe so it never disappears again.
Clog Type Two: Ground Food Has Packed the Drain Outlet
Symptom:
The unit spins normally, water drains very slowly or not at all, and the problem got worse over several weeks.
What to use:
A flat cup sink plunger.
This is compacted sludge sitting just past the disposal outlet. Rice, pasta, potato peel, coffee grounds, and oatmeal all behave the same way once they absorb water. They swell, they settle, and they set.
Fill the basin with about an inch of water so the plunger rim seals properly. Plug the second drain with a stopper or a wet rag, or your pressure escapes sideways and nothing happens.
Use a flat cup sink plunger, never the flanged toilet kind. The geometry is wrong and it will not seal on a flat sink bottom.
Plunging works by creating suction and pressure that loosens the mass and pushes it along the line.
Technique that actually matters: plunge in short rapid pulses for fifteen to twenty seconds rather than one long shove. Pulsing rocks the blockage loose. A single hard push compresses it tighter.
Watch the water level between sets. Any drop at all means it is moving.
Clog Type Three: Grease Has Coated the Line
Symptom:
Intermittent slow draining, a faint sour smell, and water that eventually goes down if you wait long enough.
What to use:
Baking soda and white vinegar, then ice and rock salt.
Grease enters as a liquid and hardens as a solid. It builds on the pipe wall in layers, narrowing the passage a little more each month until the day it finally closes.
Pour roughly a cup of baking soda into the chamber, follow with a cup of white vinegar, and let it foam for twenty minutes. Flush with warm running water.
Because many disposals use plastic internal components that harsh cleaners degrade, this pairing gives you real cleaning action on a far gentler scale.
Then run the abrasive pass. Drop in two cups of ice cubes and half a cup of coarse rock salt, run cold water, and switch the unit on for thirty seconds. The ice scours the grinding ring while the salt adds bite. It sounds destructive. It is completely safe for the appliance.
Finish with citrus. Grinding lemon or orange rind strips clinging residue and leaves the chamber smelling clean.
Be honest about limits. This routine handles film and odor. It will not dissolve a solid plug, and no home remedy will.
Clog Type Four: The P Trap Is Full
Symptom:
Everything above the trap is clear, the disposal spins freely, plunging did nothing, and the sink is still holding water.
What to use:
A bucket, channel lock pliers, and a hand crank drain auger.
Slide the bucket under the curved section of pipe below the disposal. Loosen the two slip nuts, often by hand, sometimes with pliers.
Pull the trap off and expect an unpleasant amount of sludge. That is normal, and it is usually your answer.
Clean the interior with a bottle brush or a straightened coat hanger, rinse it, and inspect the washers for cracks while it is off.
If the trap was already clear, the blockage is further out. Feed a small hand crank auger into the wall stub and turn steadily rather than forcing it.
Reassemble hand tight, then add a quarter turn with pliers. Overtightening cracks plastic nuts. Run water and check every joint with a dry paper towel.
What You Should Never Put in a Garbage Disposal
Caustic Drain Openers
This is the mistake that turns a cheap fix into a replacement.
These products rely on sodium hydroxide, sulfuric acid, or concentrated bleach. Those agents corrode metal, warp seals, and make plastic parts brittle over time.
Most manufacturers advise against them, and using one can void your warranty.
There is a practical hazard too. If the product fails, you now have a basin of caustic liquid you must fish tools through, and running the unit afterward can throw splashback onto skin and eyes.
Ask yourself:
Would you reach into standing lye with a pair of pliers? Because that is exactly the position a failed chemical attempt puts you in.
Boiling Water on a Grease Clog
Hot water feels like progress. It usually is not.
Very hot water melts fats and oils so they travel further down the line, then cool and harden somewhere less accessible.
Cold water is correct during normal grinding, because it keeps grease solid enough to break apart and flush.
A Drill on the Hex Port
Never. You can snap the flywheel or crack the housing, and neither of those is a repair. That is a new unit.
Your Hand
Tools only. Every time. No exceptions, even with power off.
The Habits That Cause Most Philadelphia Kitchen Clogs
Older rowhomes across Fishtown, Manayunk, and Point Breeze often run modern appliances into aging cast iron stacks. The disposal is fine. The pipe behind the wall has forty years of scale on it.
In those homes, small habits matter more than anywhere else.
Run cold water for thirty full seconds after grinding stops. This one change prevents more clogs than every product on the shelf combined. Disposals need steady flow to carry waste out, and running one dry leaves ground food to settle.
Feed in small batches. Dumping an entire cutting board at once overwhelms the chamber.
Keep fibrous scraps out. Celery, corn husks, artichoke, and onion skin wrap around the impellers instead of breaking down.
Keep grease out entirely. Pour it into a jar and bin it.
Skip coffee grounds and eggshells. Both look harmless. Both compact into a dense paste in the trap.
When Does Do It Yourself Stop Being Worth It?
There is a clear line, and crossing it costs more than calling.
Stop and bring in a technician if water is leaking from the seam at the bottom of the unit, which usually means an internal seal has failed and the appliance needs replacing rather than clearing.
Stop if the motor hums with no rotation after you have already freed the flywheel with a wrench.
Stop if the clog returns within a week, which points to a partially blocked branch line rather than the appliance.
Stop if you smell burning, see scorching near the wiring, or the breaker trips again after a reset.
And stop if the sink floods when the dishwasher drains. That points to a blocked dishwasher hose or a knockout plug left in place at installation, and neither is reachable from the sink side.
One more question worth sitting with:
What does a replacement unit plus installation cost you, compared to fifteen minutes of monthly upkeep? For most households, the math makes the routine obvious.
Frequently Asked Questions
Can I use a chemical drain opener in a garbage disposal?
No. The active ingredient in most of them generates heat when it meets water and can produce harmful fumes if it lingers in the chamber. Use mechanical methods instead.
Is baking soda and vinegar strong enough?
For grease film, odor, and light buildup, yes. For a solid blockage, no. Plunge or auger instead.
Why does my disposal hum but not turn?
A hard object is jammed against the impeller. Cut power, clear it with pliers, free the flywheel with an Allen wrench, then press the reset button.
Should I use hot or cold water?
Cold during grinding. Warm only as a rinse afterward.
How often should I clean it?
Once a month. Ice and salt one week, baking soda and vinegar the next.
Final Takeaway: The Safest Way to Unclog a Garbage Disposal
The safest approach is simple: mechanical first, mild chemistry second, caustic chemicals never.
Identify the type of clog before choosing a solution. A jam may need a wrench and pliers, packed food may respond to a plunger, grease can often be loosened with baking soda and gentle abrasion, and a full trap usually requires a bucket and manual cleaning.
Still hearing a hum after trying these safe methods? Contact a qualified appliance repair technician to inspect the disposal and drain line so you can determine whether a repair or replacement is the right next step.